Tools Required
- Full set of metric hex keys, Allen wrenches
- Full set of SAE hex keys, Allen wrenches
- Small, medium and large flat blade screw drivers
- Small, medium and large Philips screw drivers
- 17mm wrench
- 24mm wrench (or large adjustable wrench)
- 4GB or larger USB thumb drive
Computer
- Get all passwords
- Reboot the computer and record the proper logins for Windows.
- For FEI xT systems the Windows login MUST match the login to xT so record all Windows users and passwords.
- Record all the username and passwords for FEI xT software. Usually, the default users are:
- User:_____________________
- Supervisor:_________________
- Customerservice:______________
- Factory:______________________
- Support:___________________
- Record all passwords that are available.
- Run the DAR report, this saves all import system configuration data
- Start -> Programs -> FEI Service -> Diagnostics Auto Report
- Save the report to an external drive, USB thumb drive
Start xT Software
- You must login to Windows as Supervisor
- Double-click the FEI System Control Icon
- Click the Start button
- Login to xT software as Supervisor
- Video Reference:
Baseline
- Record the following data:
- Upper IGP:
- Lower IGP
- Chamber vacuum
- Emission current
- Save an image at:
- 5kV UHR mode
- 10kV UHR mode
- Take photos of the NanoSEM. Many photos.
- Test all the features you need
- Low Vac mode
- GSED detectors
- Stage motion
- etc.
Power Down
- Turn the FEG emitter off
- Select the Alignments page from the main UI
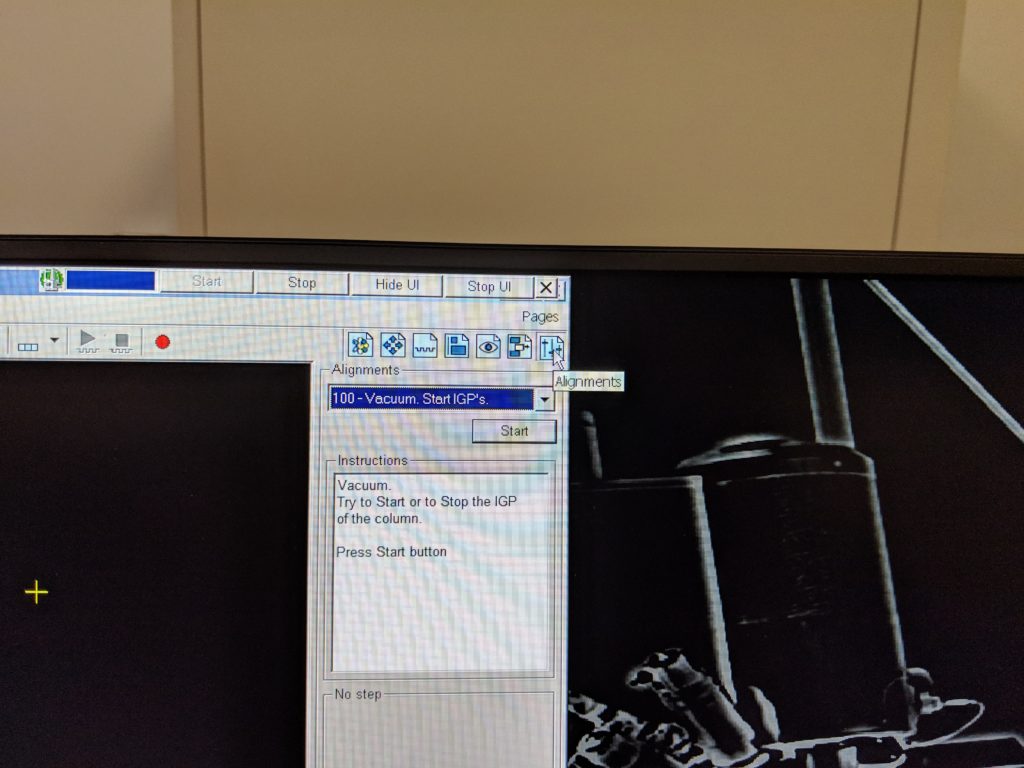
3. Select #5 Emitter Setup
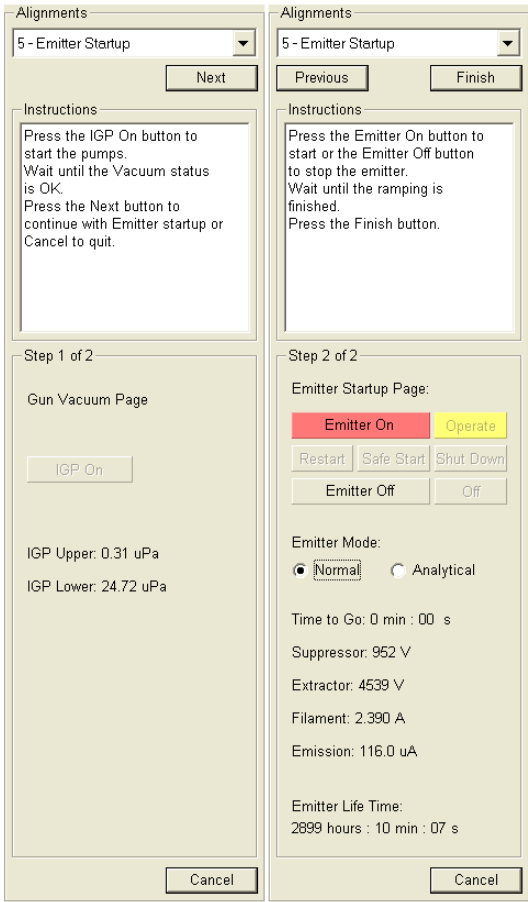
Click the Next button
Take a photo of this screen for emitter settings reference
Click the Emitter Off button
Depending on software version a delay of 30 minutes may be built into the procedure
If the delay is not built in, you must wait at least 30 minutes after the emitter is off before turning off the ion pumps (IGP)
Click the Previous button
Click the IGPs Off button
Vent the chamber
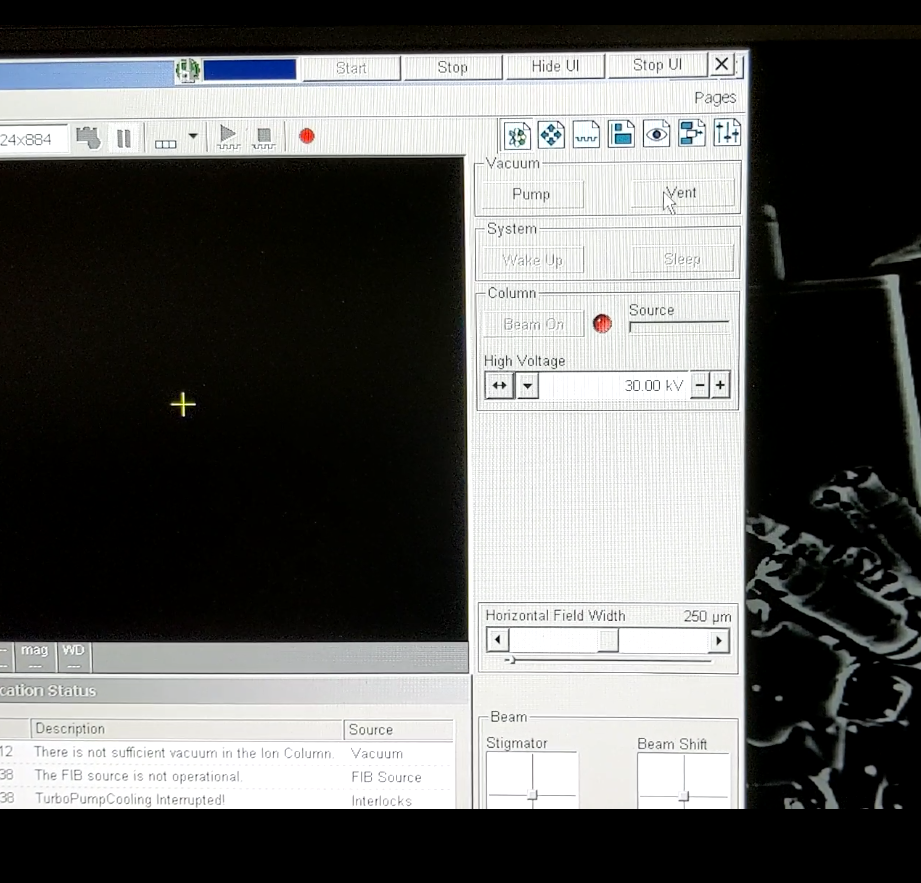
Click Stop button on the FEISystemControl bar
From the Windows Start menu shut down the computer
Press and hold the power button on the front of the vacuum chamber for 5 seconds. When you release the button the system will power off.
Video reference:
Secure the chamber frame to the console base
- Remove the tabletop.
- Simply pull both sides of the table straight forward. The table is not secured so you only have to pull it.
- The rear section removes in the same way.
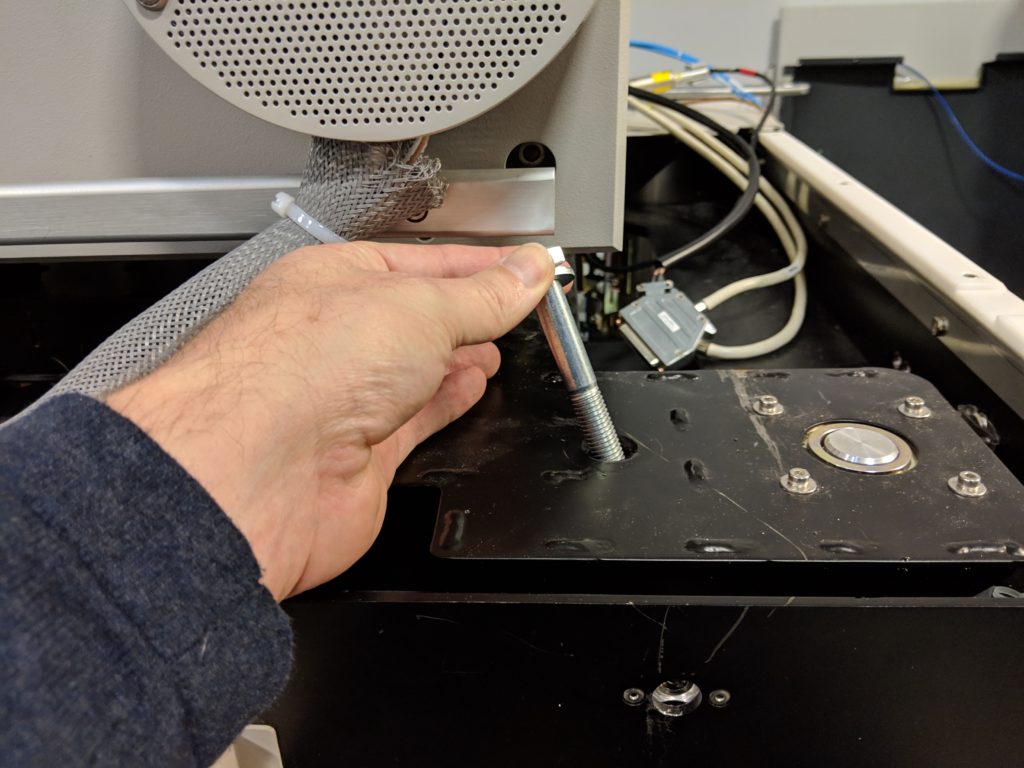
3. Locate the 4 frame securing bolts (M12 x 1.75 x 95mm). Install one in each corner of the chamber frame.
Secure the turbo pump
- Depending on instrument you may have to remove the large damper weights for transport.
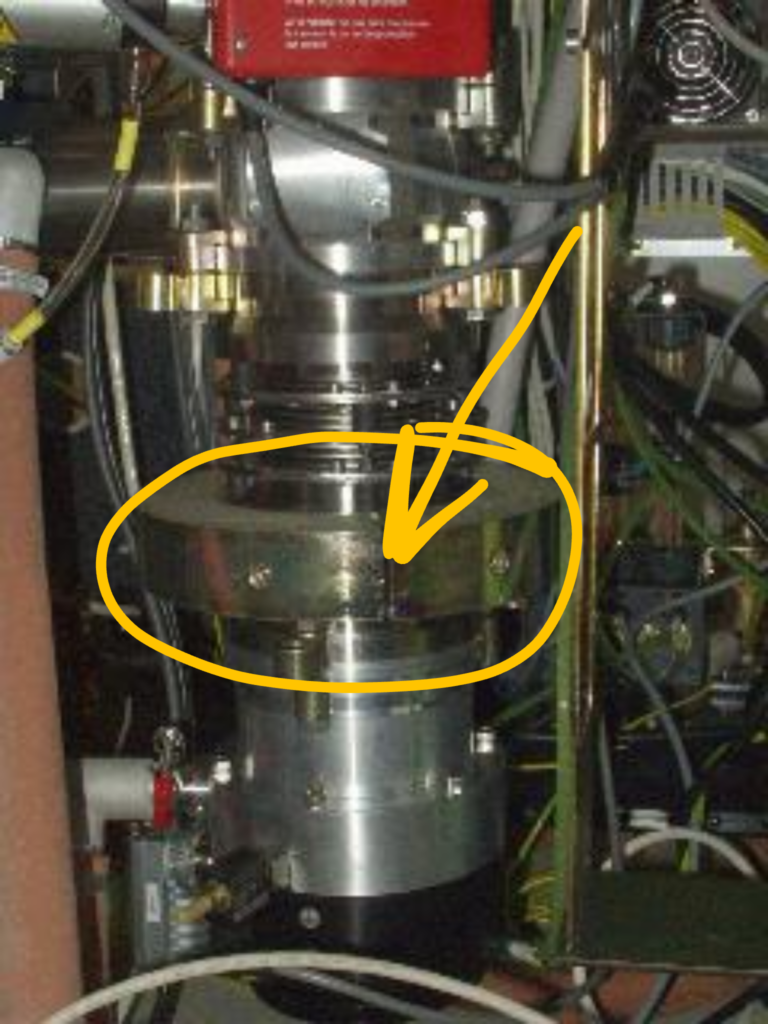
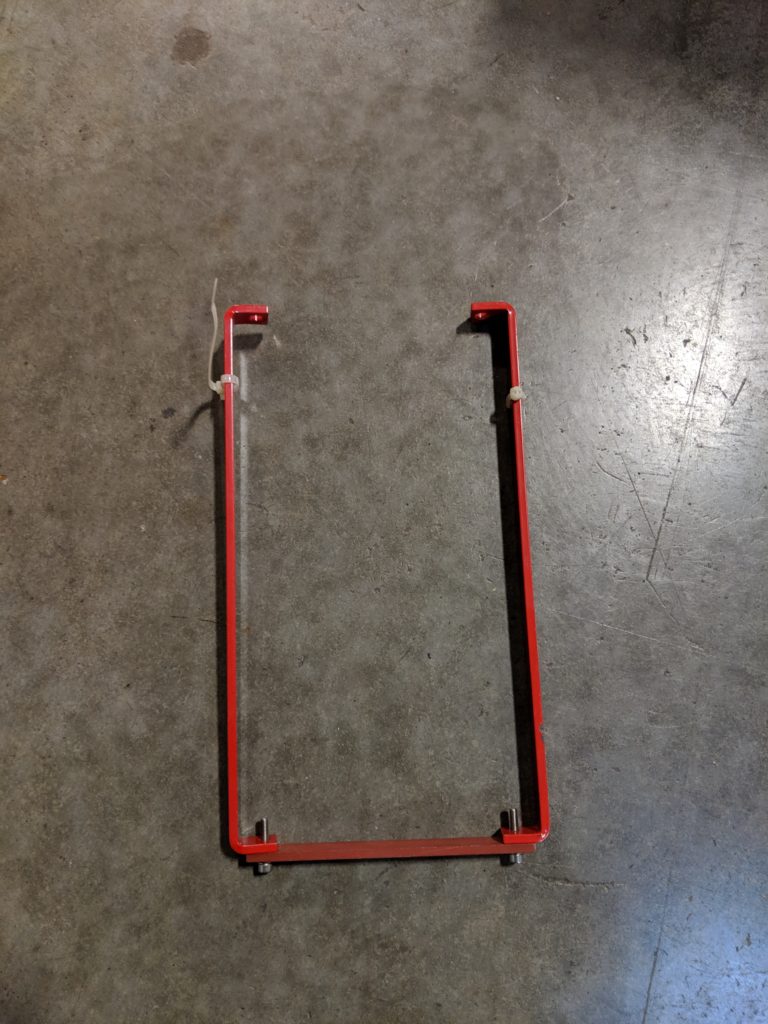
2. Install turbo pump securing brackets. There are two types pictured below.
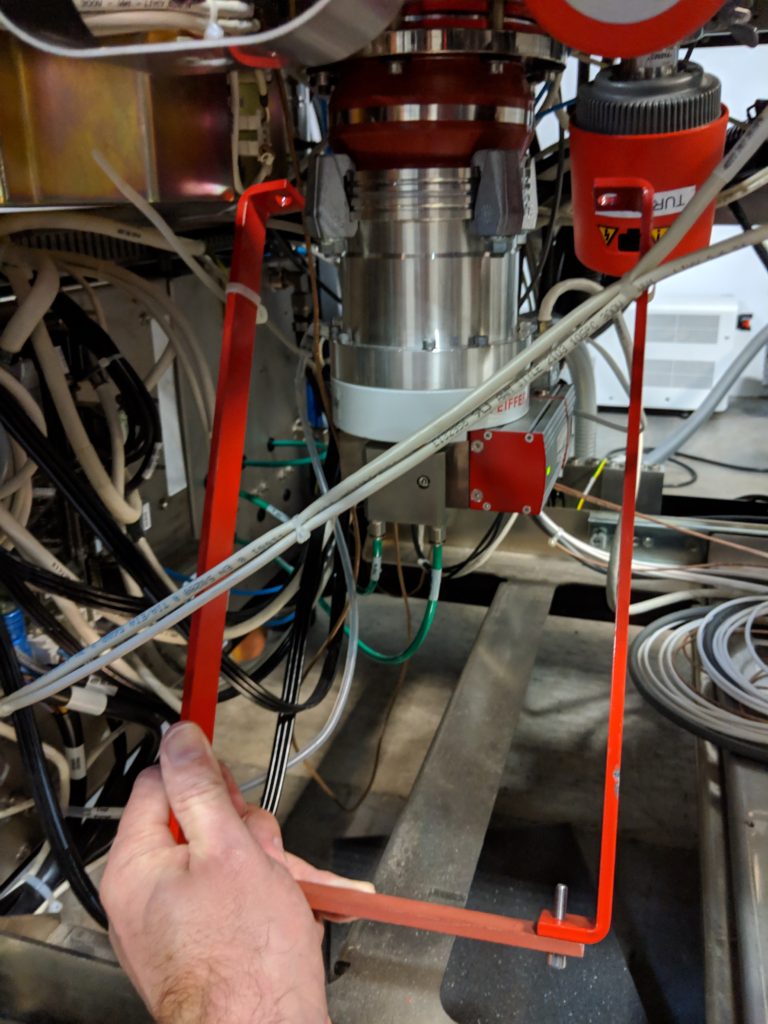

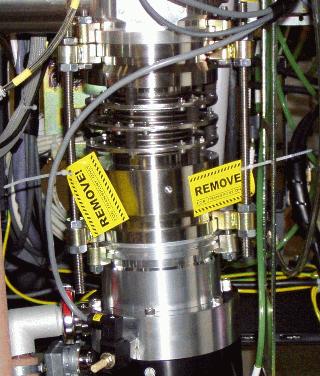
3. If you can not locate the turbo pump securing brackets, it is best to remove the turbo pump completely and pack securely and transport it separately from the console.
Remove IGP magnets

- Make sure to label the upper and lower magnets, and which side faces the column. This makes alignments more consistent when reinstalled.
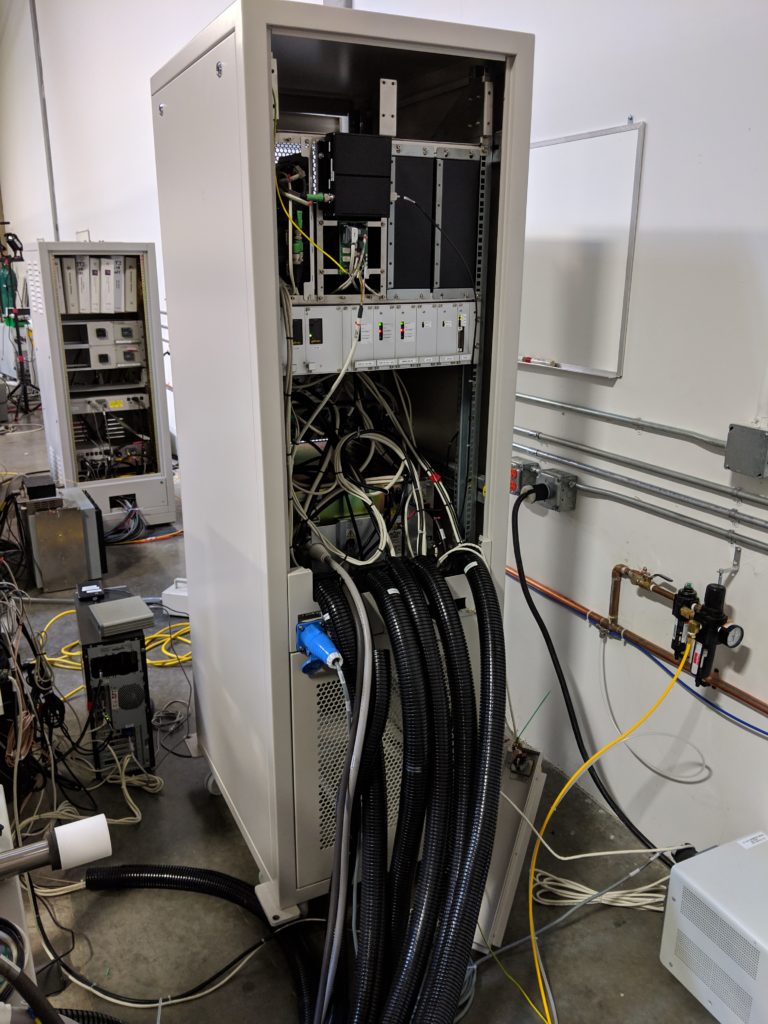
Disconnect cables
- Disconnect cables from the tall electronics rack wherever possible.
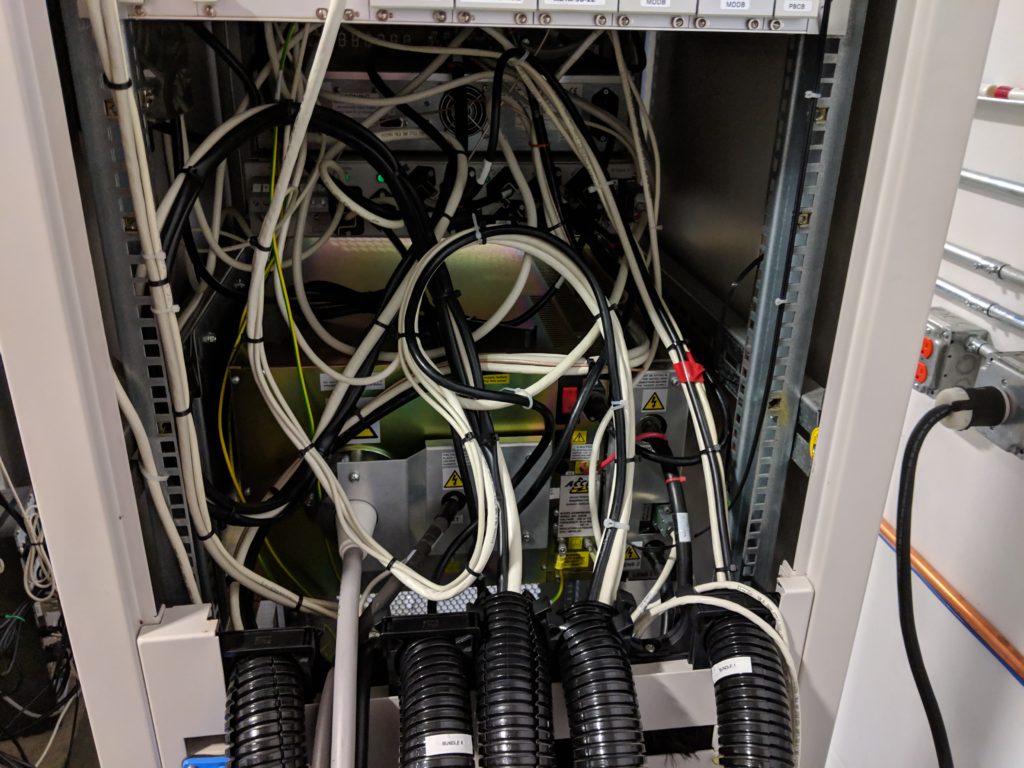
2. Protect the high voltage cable connector with plastic wrap and bubble wrap.
3. LABEL ALL CABLES!!!
4. Remove the black cable trunks from the electronics cabinet.
Lower the chamber console onto wheels
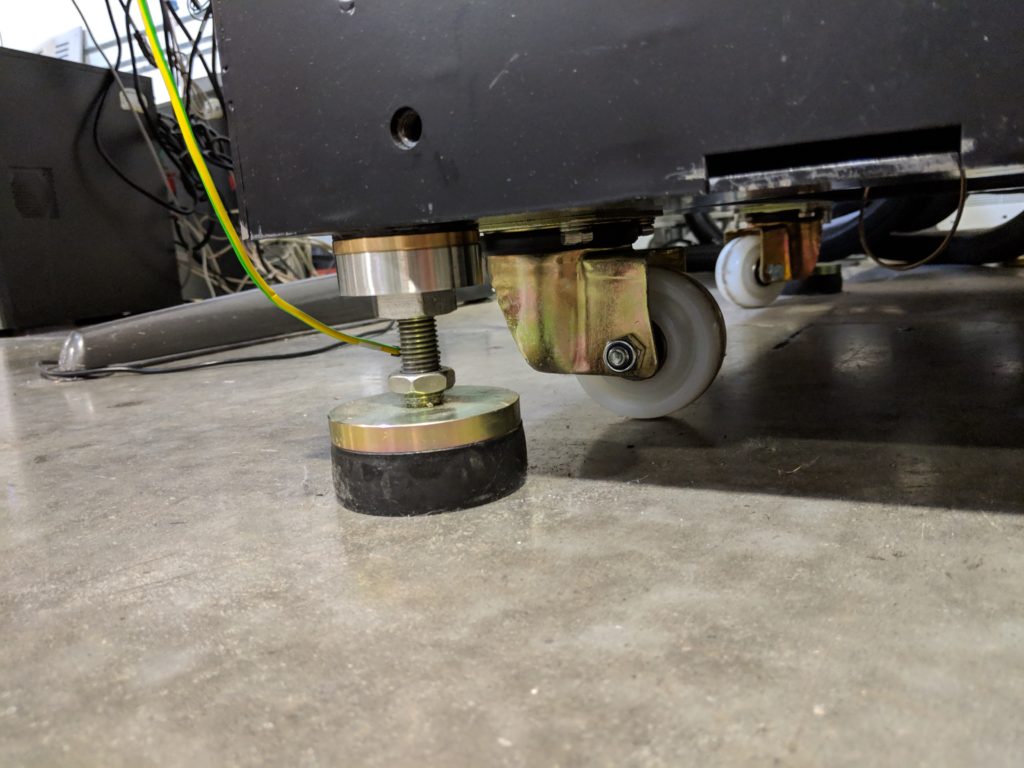
- Using a large wrench, slowly lower each corner onto its wheels.
Pack extra parts
- Pack the computer and monitors keeping the cables with each unit.
- Pack extra parts and sample holders carefully.
